- OBJECTIVE
- To lay down the procedure for Calibration of Tap density apparatus, Make – Electro lab.
- SCOPE
- This SOP shall provide the Calibration procedure of Tap density apparatus of quality control department.
- RESPONSIBILITY
- Officer/ Executive – Quality Control
- ACCOUNTABILITY
- Head QC/QA
- PROCEDURE
- Before starting the operation check for the area cleanliness and instrument cleanliness.
- Connect the pin to power supply and switch on the power.
- Operate the instrument as per sop no BA (II) QA210, operation of Tap density apparatus.
- The instrument shall be calibrated for the following parameters.
- (a) The drop height of the cylinder holder.
- (b) The number of drops per Minute of cylinder holder.
- Calibration of Drop height of cylinder holder for USP method 1:
- Open the top cover by removing bottom screws.
- Turn the cam attached to the motor shaft clock wise, so that the cylinder holder shaft is at the minimum position.
- Make sure that the bottom plate of the cylinder holder is in perfect contact with the tapping platform.
- Measure the distance between the platform and the clamp plate of cylinder holder; this reading is the base height (Hr).
- Rotate the cam further by hand, clockwise till the cylinder holder shaft reaches maximum height.
- At this position the shaft tip should be on the falling edge of the cam arm. Mark this arm no -1.
- With a digital Vernier caliper measure the distance between the top plate of frame and clamp plate of cylinder holder.
This is height H1. - Make a mark on the point of measurement on the top plate of frame and on the cylinder plate.
- The difference between these two readings is drop height of the cylinder.
- Mark arms 1, 2 and 3 and heights H1, H2, H3 and so on. Repeat the above procedure for all arms.
- Make sure that the point of measurement on the platform and on the cylinder holder plate is maintained the same for all measurements.
- Record the results in the given format (Annexure 1).
- Calibration of Drop height of cylinder for USP 2 method.
- Repeat the above all steps for all arms and record the results in the given format.
- Calibration for Number of drops of cylinder holder per minute:
- Set the instrument as per USP 1 method and operate the instrument.
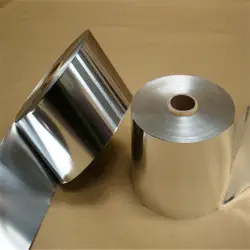
- Paste a small piece of Metal reflection paper on cam.
- Focus the light of tachometer on metal reflection paper sharply at a distance about 20cm approximately.
- Multiply the rotation per minute which is displaying in tachometer by three and record the values in calibration format.
- Repeat the operation for 3 times and check the set number of tapings and record the values in calibration format.
- The number of drops should be between 300 ± 6 drops.
- Similarly set the instrument as per USP 2 method and operate the instrument.
- Multiply the rotation per minute, which is displaying in tachometer by four and record the values in calibration format.
- The number of drops should be 250 ± 5 drops.
- Enter the details of calibration in log book.
- Forms and Records (Annexures)
- Instrument calibration Format Bulk Density Test Apparatus – Annexure-1
- Distribution
- Master copy – Quality Assurance
- Controlled copies- Quality Assurance, Production, Quality Control.engineering
- History
Date Revision Number Reason for Revision – 00 New SOP
Annexure-1
Instrument calibration Format Bulk Density Test Apparatus
| Make | : | Instrument No. | : | ||||||||||||
| Model | : | Calibration Date | : | ||||||||||||
| SOP reference No. | : | Next due date | : | ||||||||||||
| DROP HEIGHT OF CYLINDER: Vernier caliper reference number: | |||||||||||||||
| USP – 1 | USP – 2 | ||||||||||||||
| Big holder | Arm
1 H1 |
Arm
2 H2 |
Arm
3 H3 |
Tolerance limit | Arm
1 H1 |
Arm
2 H2 |
Arm
3 H3 |
Arm
4 H4 |
Tolerance limit | ||||||
| HI | |||||||||||||||
| HR | |||||||||||||||
| Drop Ht
(HI – HR) |
12 to 16mm | 2.7 to 3.3mm | |||||||||||||
| USP – 1 | USP – 2 | ||||||||||||||
| Small holder | Arm
1 H1 |
Arm
2 H2 |
Arm
3 H3 |
Tolerance limit | Arm
1 H1 |
Arm
2 H2 |
Arm
3 H3 |
Arm
4 H4 |
Tolerance limit | ||||||
| HI | |||||||||||||||
| HR | |||||||||||||||
| Drop Ht
(HI-HR) |
12 to 16mm | 2.7 to 3.3mm | |||||||||||||
| NUMBER OF DROPS /MINUTE: | |||||||||||||||
| Method | Observed drops /minute | Tolerance Limit (± 2.0 %) | |||||||||||||
| USP-1 | 294 to 306 drops | ||||||||||||||
| USP-2 | 245 to 255 drops | ||||||||||||||
| CALIBRATION STATUS: COMPLIES / DOES NOT COMPLIES.
Calibrated by: Checked by: Approved by : Date : Date : Date : |
|||||||||||||||
For More Pharma Updates Visit –https://pharmaguidances.com

